
If you have an existing floorplan saved in a graphic format like such as bitmap (.bmp), JPEG (.jpg), PNG (.png), PDF (.pdf) or .gif, you can import it into your Vivien drawing, and then continue to customize it within Vivien by adding tables, chairs, and so on to it.
You can import floorplan images in 3 view types:
Notes:
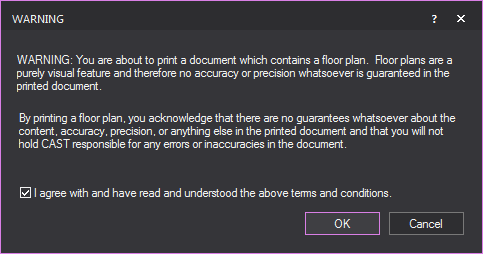
Attention: Imported floorplans are a purely visual feature without any guarantee of accuracy and precision in the printed document. When printing a floorplan, a Warning dialog box appears asking for you to acknowledge that there are no guarantees about the content, accuracy, precision, or anything else in the printed document and that you will not hold CAST responsible for any errors or inaccuracies in the document. Select the checkbox and click OK to proceed.
Note: Before you perform this procedure, you must know the precise dimensions of at least one of the elements in your imported floorplan. For example, if it contains a stage, note the width of the stage before you import the graphic into your Vivien drawing.
or
In Front or Back view, click File > Import Floorplan > Front/Back.
or
In Left or Right view, click File > Import Floorplan > Left/Right.
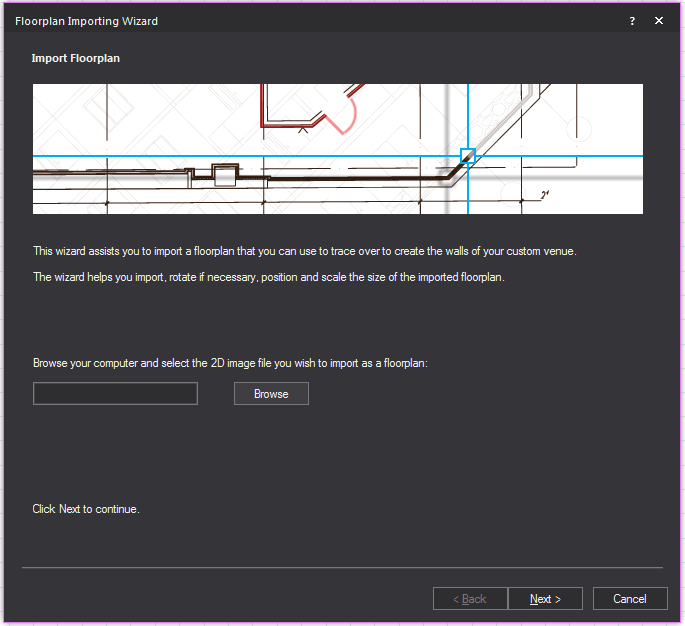
Result: The Floorplan Importing Wizard window appears.
Result: The file browser window opens.
Result: The file browser window closes. The location of the floorplan image will be in the Browse field.
Result: The wizard switches to the Rotate Floorplan page. Here the floorplan image can be rotated 0°, 90°, 180° or 270°.

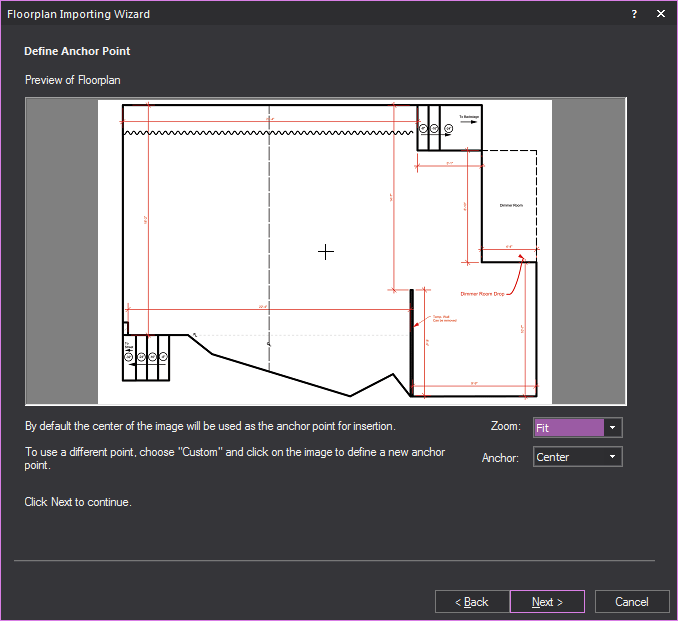
Result: The wizard switches to the Define Anchor Point page. You can select from predefined anchor points or create your own.
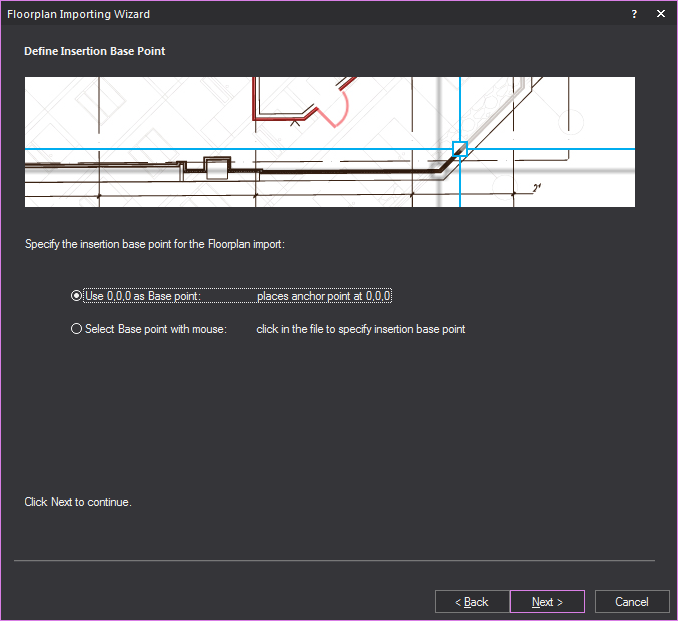
Result: The wizard switches to the Define Insertion Base Point page. The anchor can be inserted at either the origin or a user selected point.
Result: The wizard switches to the Specify Floorplan Scale page. Here a dimension line is drawn between two points of the floorplan to determine its scale.
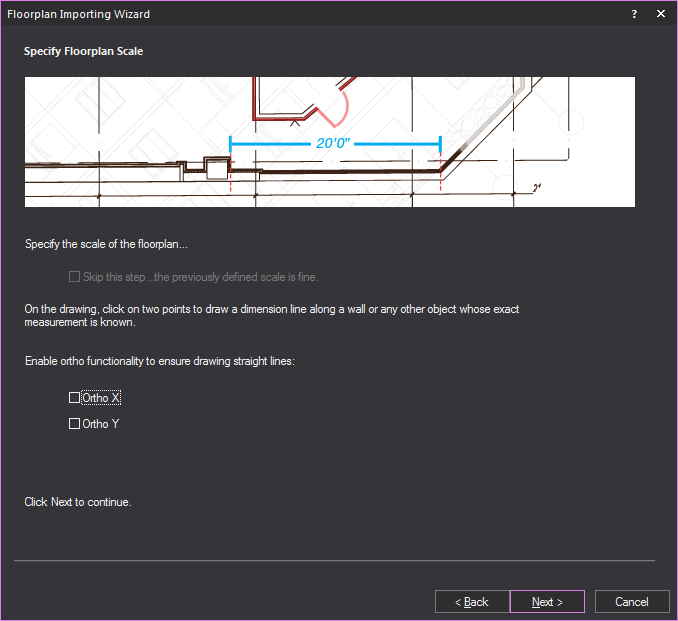
Note: This step can be skipped if you are modifying a previously imported floor plan, by selecting the Skip this Step checkbox.
Result: The window minimizes and the floorplan is inserted into Vivien.

Result: The Import Floorplan window reappears, prompting you to enter the length of the line that you have just drawn.
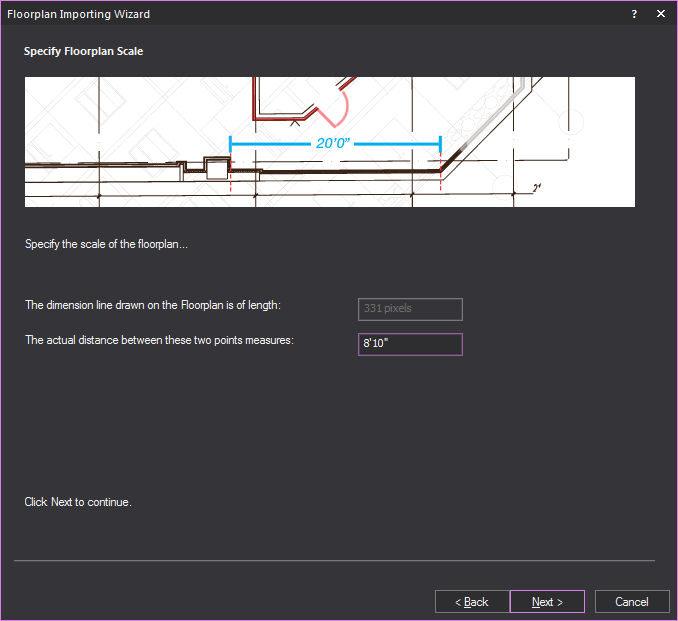
Result: Vivien adjusts the size of the floorplan based on the scale that you have entered to ensure that your drawing is accurate. The floorplan appears in your drawing in plan view (the only view in which you can see it).
Note: You can delete floorplans, but once deleted, the floorplan must be re-imported in order for it to be available once again. Since this process may affect the measurements set in the above procedures, it is recommended that you only delete floorplans once everything is finalized.
If you have imported a floorplan into your Vivien document, and then want to remove it, you can delete it from the file.
Result: The floorplan is deleted.
![]() © The CAST Group of Companies
Inc., 2004-2022 All rights reserved.
© The CAST Group of Companies
Inc., 2004-2022 All rights reserved.