
Using the Image Manager
The Image Manager enables you to store images
as sources in Vivien, and then change the properties of saved sources
instead of working with individual images. For example, by using the Image
Wizard to assign textures to saved sources instead of to specific images,
you can change or modify the texture of multiple objects at the same time.
The Image Manager also enables you to perform minor image
modifications, such as flip horizontal or flip vertical to images without
permanently changing the source file. This feature is useful in situations
where the texture is flipped as a result of incorrect surface winding.
For details, see “Drawing
surfaces”.

Notes:
- The Image Manager window
preview can be resized to accommodate images that have a higher or
wider aspect then the default window size.
- The Image Manager window
preview will display a grey checker pattern to identify the alpha
levels that are defined in an image.
- The maximum resolution of an image that can be
imported into the Image Manager is
equivalent to 4,194,304 pixels (2048 x 2048). You can import into
the Image Manager, images that are very
wide and not tall, or vice versa.
To access the image manager
- From the .
Result: The Image Manager appears.

To create a new
image source in the image manager
- In the Image Manager,
click New.
- Browse to locate the image on your computer, and
then click OK.
Result: The image is added as a source.

Source Properties
- Source Name: The
image’s file name.
- Source Path: The
path to the physical file. Click the file open icon to select a new
file.
- Flip Horizontal:
Select this option to flip the image source horizontally. For details,
see “To
flip an image source”. Note that you cannot flip image
subsources.
- Flip Vertical: Select
this option to flip the image source vertically. For details, see
“To
flip an image source”. Note that you cannot flip image
subsources.
- Dimensions: The file’s
dimensions in pixels.
- In Use: Informs you
of whether the image source is in use. If the image source is currently
in use, it cannot be deleted from the Image Manager.
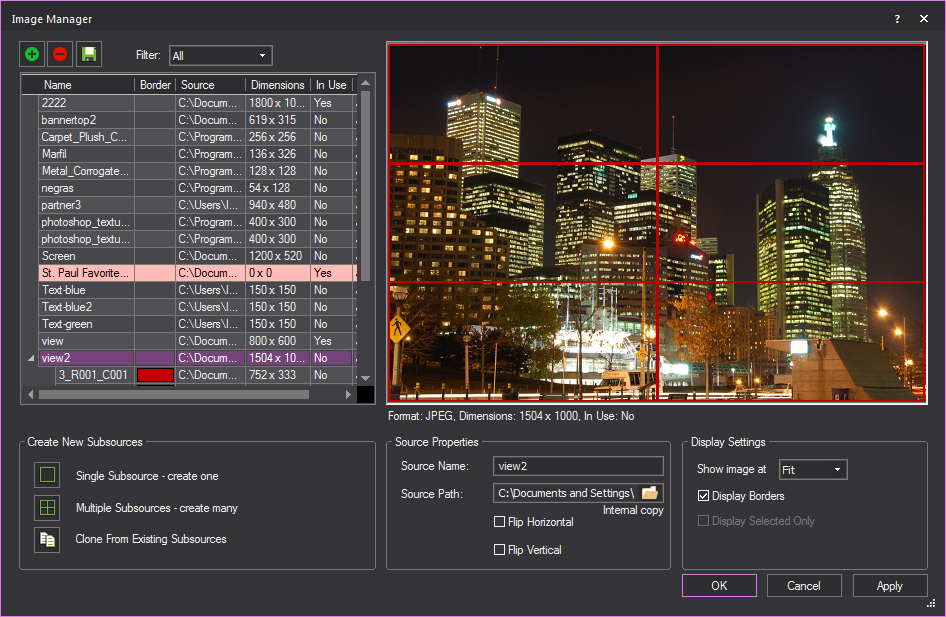
Display Settings
- Show image at: Select
the zoom level for the image. You can choose to "fit" the
image in the display window, or show it at a percentage of its actual
size: 100%, 200% or 300%.
- Display Borders:
Select this option to show the subsource borders in the display.
- Display Selected Only:
When you have selected a subsource in the table, select this checkbox
to only show the subsource
in the display area; if you do not select this checkbox when a subsource
is selected, the entire source is shown (with the subsource borders
highlighted in the display if you selected Display
Borders).
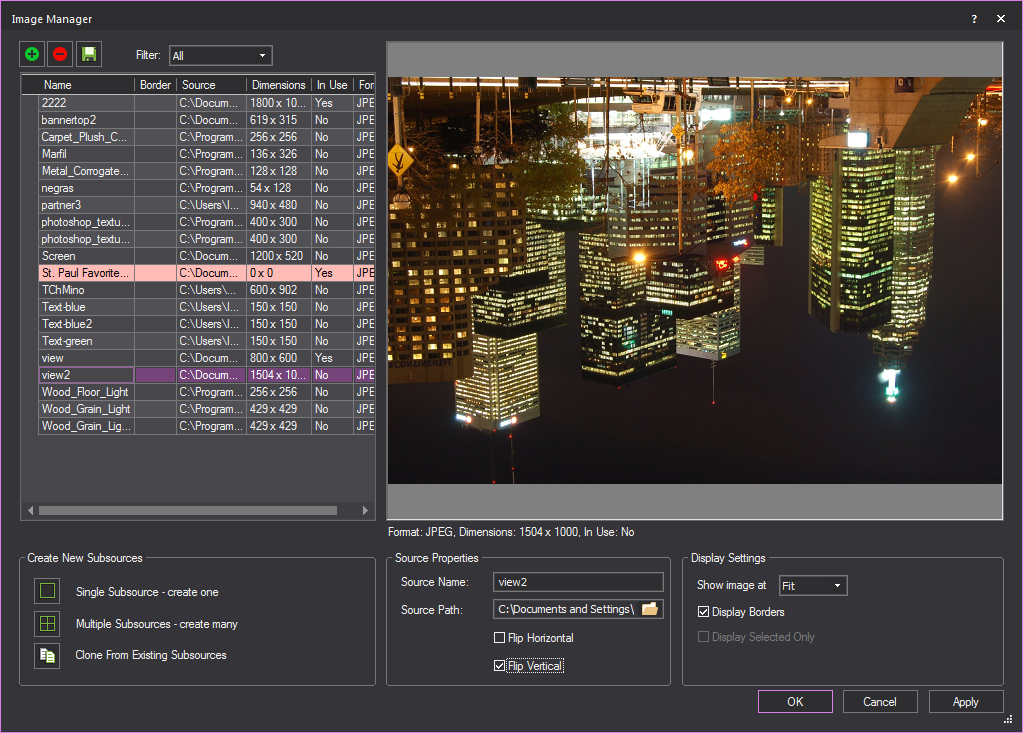
To flip an image
source
In situations where a surface was drawn
in a clockwise direction (see “Drawing
surfaces”), the texture may appear to be “flipped” either horizontally
or vertically. To avoid this problem, flip the image source using the
Flip Horizontal or Flip
Vertical checkboxes, as shown below. Note that you cannot
flip image subsources; only the actual image source can be flipped.
- Open the Image Manager.
- In the table to the left, select the image source
that you want to flip.
- Based on the direction in which you want to flip
the image, select either Flip Horizontal or
Flip Vertical.
Result: The image is flipped, as shown in the following
sample graphic, which was flipped vertically.
To export an image source
After flipping the image, you may want
to save your changes to a new image file as follows:
- Open the Image Manager.
- In the table to the left, select the image source
that you want to export.
- Click the Save icon
in the top left of the window.
- Type a name and select a file type for the new
image, or accept the default file type of PNG.
Note: When exporting an image source the default
file type is PNG, but you can choose a different file type, if desired;
when exporting a subsource, you cannot choose the file type. The subsource
is exported to the same file type as its source.
- Click OK.
Missing images
When you move image files from their original
location, they may not load from within Vivien. When this happens, the
image source will be highlighted in red, as shown in the following graphic:
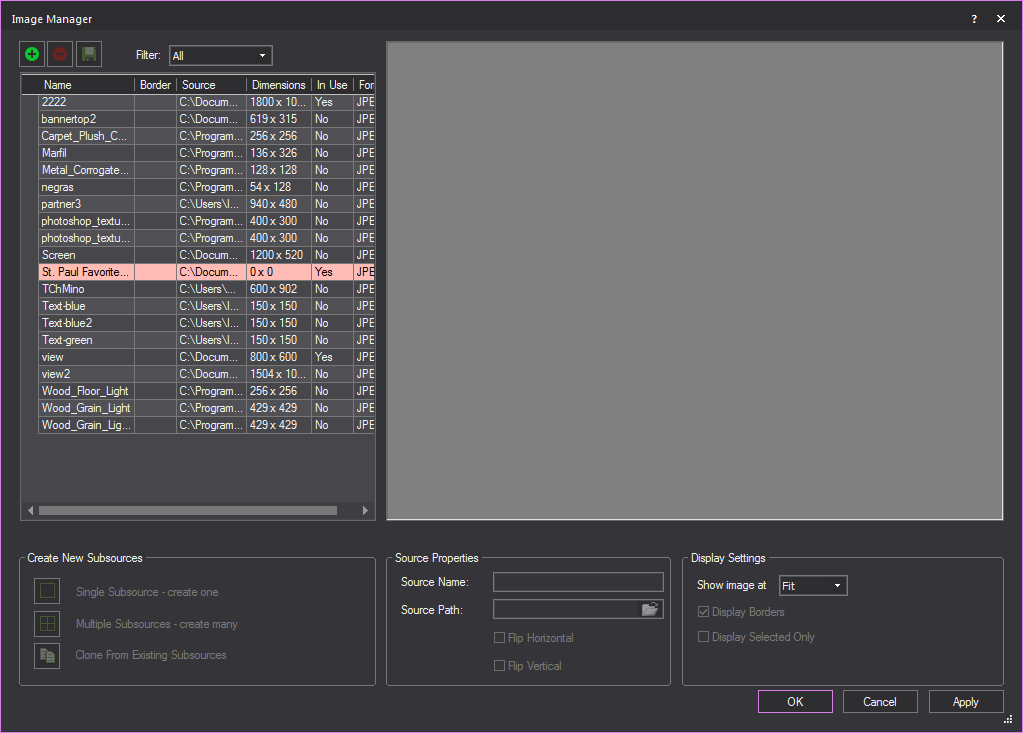
To address this issue, select the image
source highlighted in red, click the folder icon beside the Source
Path box, and browse to select a new image. When you are finished,
click OK.
Image subsources
Just as with videos, you can create one
subsource or multiple subsources from an image using the following procedures.
Image subsources are useful in scenarios where you need to apply part
of an image to one object and another. Normally, to do so you would need
to open the image in a photo editing software program, make your edits,
crop the image, and then import two images. However, with the image subsource
creation feature, you can just import the source file, and create the
necessary subsources within Vivien. For example, you could use this procedure
if you have a photo that you want to break into quadrants (2 x 2), and
then apply each quadrant to a separate surface, screen or LED wall, etc.
To create a single image subsource
- In the left pane of the Image
Manager, click to highlight the image which you want to create
a subsource for.
- In the bottom left corner of the window, click
Single Subsource - create one.
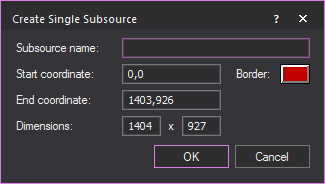
- Type the subsource name.
- By default, the system uses the start and end
coordinates of the selected source, but you can change these values
as desired. When you change these values, the system automatically
updates the dimensions.
- Click the Border box
to specify the color of the border that will appear around the subsource
when displayed.
- Click OK.
To create multiple image subsources
- In the left pane of the Image
Manager, click to highlight the image you want to create subsources
for.
- In the bottom left corner of the window, click
Multiple Subsources - create many.
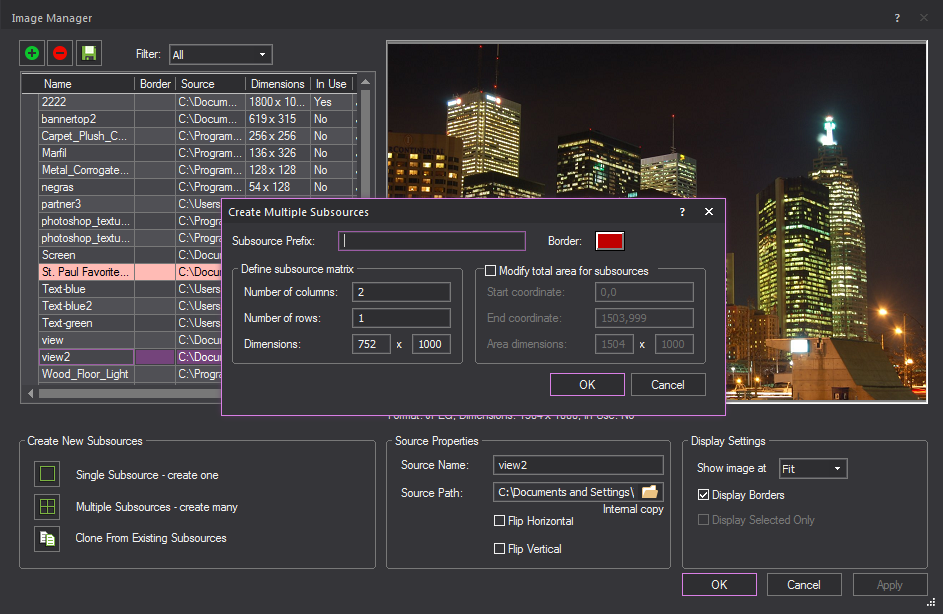
- Type the subsource name.
- Define the subsource matrix by specifying the
number of columns and rows. The dimensions of the subsources are displayed
for your reference.
- By default, the subsources are created by taking
the overall source area (height & width) and evenly dividing it
by matrix provided. However, you can modify the total area by changing
the start/end coordinates and, therefore, the overall dimensions used
to create the subsources. To do so, select the Modify
total area for subsources checkbox, and then type the new coordinates.
Notes:
- Subsources are always listed below the source
from which they were created.
- The table in the Image Manager provides a convenient way
of displaying source/subsource information; all sources and their
subsources are grouped, and can be expanded/collapsed.
- You can rearrange the columns in the table by
clicking the column header and dragging it to the new position.
- You can adjust the width of columns by clicking
the column border and dragging the column to its new width.
To clone an existing subsource to a new image
- In the left pane of the Image
Manager, click to highlight the image you want to clone a subsource
to.
- In the bottom left corner of the window, click
Clone From Existing Subsources.

- Select the media type that contains the subsource
you want to clone, either Image Sources or
Video Sources.
- Select the desired subsource from the corresponding
source drop-down menu.
- Enter a name for the cloned subsource in the Subsource Prefix field.
- Click Apply.
Result: The selected subsource will be cloned and
applied to the selected image.

Changing the properties of image sources
Note: If you change the source after the subsources
were created, and the new source has different dimensions that do not
match the subsources dimensions, the affected subsources are highlighted
in yellow (and a dialog appears to notify you as such).
When you select a row in the Image
Manager table, the properties of the image source are displayed
in the Source Properties section of the window.
You can change various properties of the image source as follows:
- To change the border color of image subsources,
in the table, click the appropriate border color and then click on
the drop-down box that appears to select the new color. Click Update.
- To change the name of the image source or subsource,
in the table, click the appropriate row. Type the new name, and then
click Update.
- If you have already applied an image to multiple
objects, and then you want to replace the source file with something
different, you can make the change once in the Image
Manager and have it automatically
applied to all related objects (i.e., you don’t have to individually
apply the changes to each object's properties). To do so, you change
the underlying source file to the Image name.
- You can define a subsource either by its start/end
coordinates or by its dimensions:
- To resize the subsource, click the appropriate
row in the table. Change the start/end coordinates as desired, and
then click Update. Note that if you change
the coordinates, the system updates the dimensions automatically.
- To change the dimensions of a subsource, click
the appropriate row and then type the new dimensions. Note that when
you change the dimensions, the system will automatically add to the
start coordinate to determine a new end coordinate. Click Update.