
The Virtual View tab lets you instantly see a very realistic representation of your drawing in 3D and color. You can spin the room around to view your event from any angle and export the images as graphic files that you can email to your clients or insert in your proposals. The Virtual view images are very detailed, giving you a quick glimpse at your design so you can tweak lighting, color, and set up before creating the actual rendering. Using the Virtual View Fixture Selection Tool, you can also select fixtures and adjust their settings with the Light Tool right in the Virtual View.
Here is an example of a typical Virtual view image of an event:
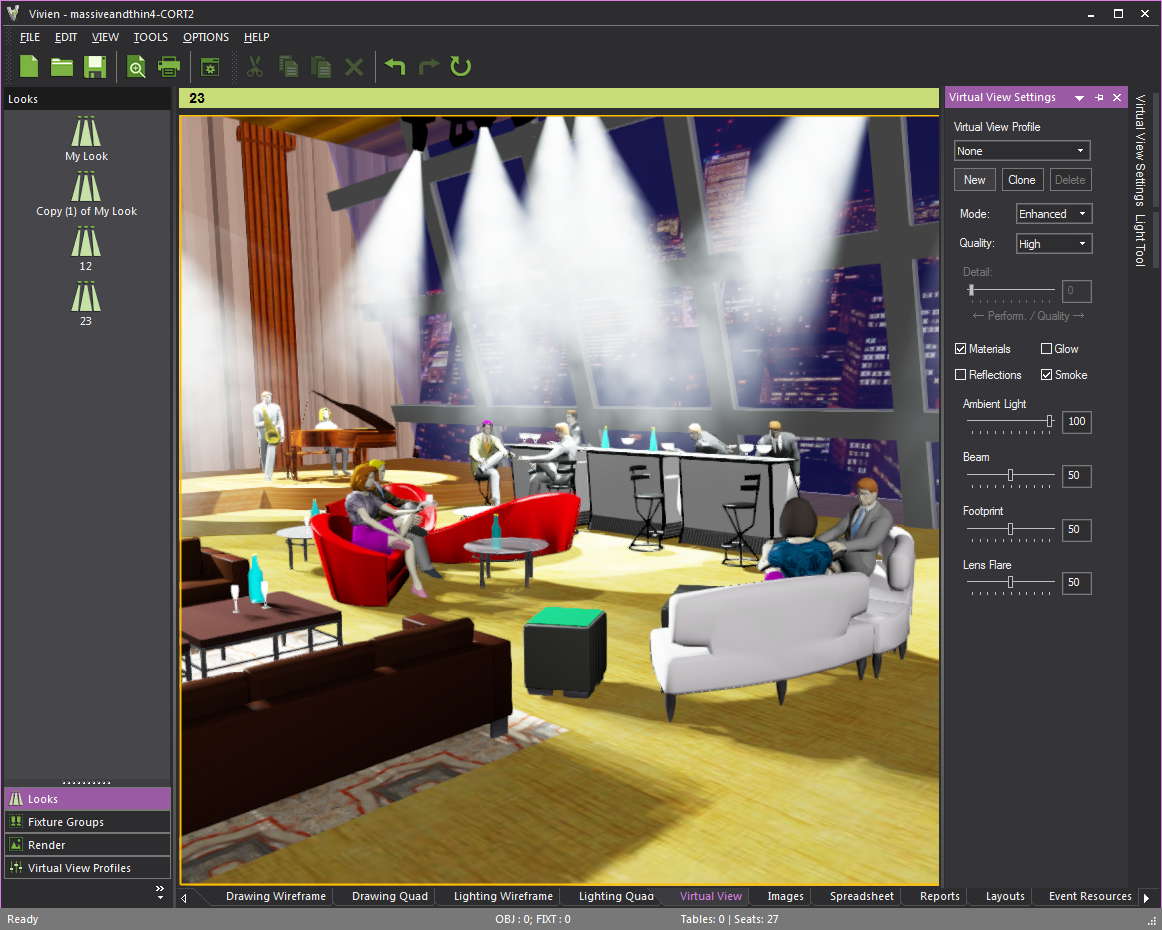
As shown in the image below, the Virtual view includes optional features which can be turned ON or OFF at any time by using the options on the General tab. For details, see "General tab".
When you are on the Virtual View tab or in the image preview pane of the Render Wizard, you are looking at your drawing through an invisible, default “camera.”
The default camera control for Virtual View is Traditional Vivien. Alternately, in the Application Options window, you can choose the Other 3D Applications on the Virtual View Camera Control drop-down list if you want to use camera control that complies with other 3D applications. See "Camera Control" for alternative mouse and keyboard action commands.
In the Traditional Vivien default, you can arrange the point of view of this camera in a few ways, depending on the effect that you want to achieve:
If you have drawn cameras at different angles in your room, you can instantly switch from one camera to another. For more information on switching cameras in Virtual View, see "Using the Camera toolbar" or "Switching cameras in virtual view".
![]() © The CAST Group of Companies
Inc., 2004-2022 All rights reserved.
© The CAST Group of Companies
Inc., 2004-2022 All rights reserved.