
Vivien includes an extensive library of predefined objects that you can quickly add to your drawings. These are 3-dimensional shapes drawn to scale representing the real life objects you need to account for when planning your event (for example, tables, chairs, podiums, projectors, and lights).
You add Library objects in drawing wireframe views (Drawing Wireframe and Drawing Quad tabs).
You can add objects one at a time directly from the Library, or in the case of chairs and tables, you can use a wizard to automate their placement. The Seating Wizard helps you add many chairs or tables at once, in arrangements that optimize the use of space. For details, “Adding multiple chairs or tables using the Seating Wizard”.
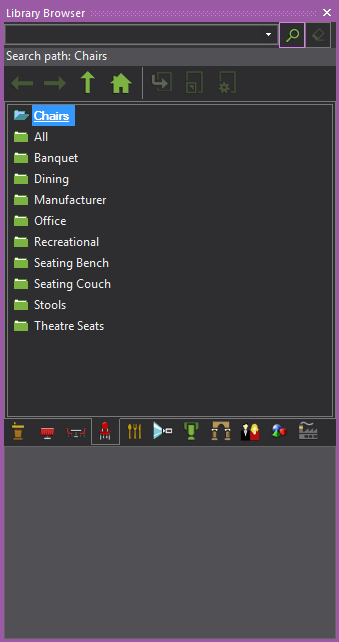
You can view the contents of the Vivien library in the Library Browser. The Library Browser is categorized to help you find the items you are looking for. Each category is represented by a menu item in the Library menu and a tab in the browser.
Library category |
Includes the following... |
|---|---|
Staging
|
Items associated with a stage |
Tables
|
Different types of tables in different
shapes and sizes |
Table Sets
|
Different types of tables with chairs placed around them. |
Chairs
|
Different styles of chairs |
Banquet
|
Items that would be placed on tables |
A/V
|
Audio visual equipment |
Lighting
|
Lighting equipment |
Architecture
|
Architectural elements for example, columns and arches |
People
|
Images of people (to help visualize
the environment) |
Objects
|
Miscellaneous objects |
Manufacturer
|
Library items from vendors such as CORT Event Furnishings, AFR, Backdrop Fantastic, etc. |
Result: The Library Browser appears with the selected category highlighted.
Notes:
or
Double-click the object name.
Result: The object attaches to the cursor with default settings.
Tip: For library objects, you can activate the Library Snap tool to display the snap points and the “Default” insertion point of the Library item displayed in red when not selected, which turns to green when selected. When the Library object insertion begins, right-click to access and select a different insertion point from the menu list. See “Using library snap”.
Result: A symbol for the object displays at the crosshairs.
Note: If the following symbol displays at the crosshairs, you cannot place the object at the cursor location. The message on the status bar provides the reason why.
Result: A symbol for the object displays on the drawing. For information on symbols, see “How library objects are represented in drawings”.
Tip: Once you have added an object, you can duplicate it several times at once using the Clone tool. For details, see “Copying objects”.
You can save time by using the Library Search feature. In the Library Browser, simply click the category tab that you are interested in, and then type the object name (or part of it) in the Search box at the top of the browser panel. All objects that match your query are shown.
 The
Search button.
The
Search button.
Result: The results of your search appear in the browser pane.
Tips:
![]() The Home button.
The Home button.
 The
Clear button.
The
Clear button.
Library items use “Default” insertion points defined by the library model to insert into your drawing. In addition to the default, a library item has 10 available insertion points around its bounding box corners. You can select the insertion point when inserting a library item into your drawing.You can choose from any of the top corners of the bounding box, or bottom corners, or top center, or bottom center.
When you select a different insertion point, the cursor switches to the specified point and insertion continues with the new insertion point. The insertion point is identified by a red square when Library Snap is enabled.
Result: The cursor switches to the specified insertion point.
Note: Once a Library item’s insertion point has been changed during insertion within the project, it is remembered for future insertions from the Library Browser, and will be used when performing some CAD operations such as Copy/Paste, and Move and Rotate (when object’s base point is preferred in these operations).
Library Snaps are snap insertion points drawn at the bounding box corners of the library item, and one corner is displayed in red to represent the library item’s insertion point.
When Library Snap is enabled, all library items in the drawing will display their snap points, which can be used as a snappable insertion point that will align the placement of the item in Wireframe views.
When Library Snap is enabled, the insertion point is identified by a red square if the object is not selected, which turns to a green square if the object is selected. The default insertion point can be changed by selecting a different insertion point from the menu list that appears when you right-click the library item you are inserting. The cursor switches to the specified insertion point.
Note: Library Snap only applies to objects from the Library tab in the Library Browser.
Tip: You can also click the Library Snap tool on the Tools toolbar.
![]() The Library Snap button.
The Library Snap button.
Result: The library object appears with the snap points at its bounding box corners and the cursor is attached to the default insertion point displayed in green when selected.
Note: In Wireframe, Library Snap is automatically enabled at the start of Mirror and Paste, Move and Rotate operations.
Library shortcuts give you quick access to library objects that you use frequently. Shortcuts display on the shortcut bars to the left of the working area. Clicking a shortcut for an object is the same as finding the object in the Library Browser and using the Insert command.
![]() The
Create Shortcut button.
The
Create Shortcut button.
or
Right-click the object name and select Create Shortcut.
Result: A shortcut to the object appears on the shortcut bar corresponding with the library category for the object.
For more information about shortcuts, see “Working with shortcuts”.
 The
Properties button.
The
Properties button.
Result: The Properties window appears.
Custom library items are made of one or more objects, including custom items that you have drawn as well as existing library items. You can save a custom library item for a complex object that you have drawn and think you might want to use again.
When you save custom library items, all of the item’s original properties are saved, including its texture and color. In addition, if the item that you are saving is broken down into separate elements, then these elements are also saved with the item and can be viewed on the Appearance tab. For example, if you are saving an object like a riser, each of the four riser elements is saved with the custom library item.
Notes:
Tip: If the menu item is greyed, one or more of the selected objects cannot be included in the custom library item.
Result: The Library Item Wizard opens, displaying a rotating Virtual View of your new item.
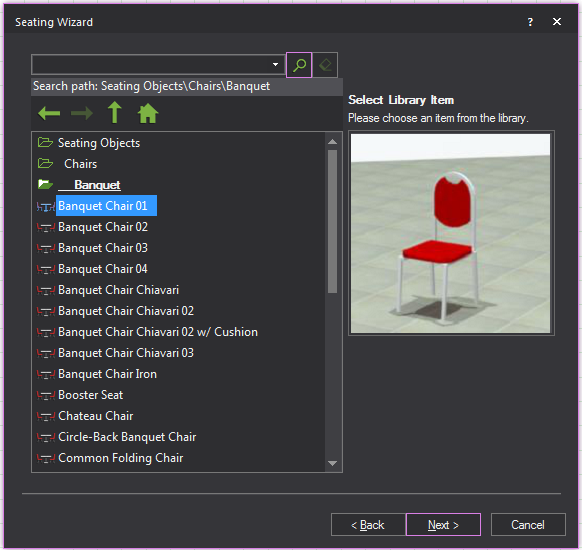
Note: The path is the location in the library where the item will be stored. An item assigned to the path “Custom/Tables” would be available in the custom section of the items library in a subcategory named “Tables”. Note that if you save a custom library item in the Tables or Chairs folder, then it will be available when choosing seating items with the Seating Wizard (within the Custom folder).
Result: The custom item is placed in the item library as per the path specified in step 3.
In general, a custom library item that has been shared with the application library, (i.e. by selecting the Make this item available to other documents in the first step of its creation) can only be deleted from the Welcome Screen’s Library Browser. A custom library item can be deleted from within a file as long as there are no instances of the item in the file.
The following are specific examples of when a custom library item can be deleted:
Note: A custom library item will always be included in the “private library” of the file in which it was created. If a custom library item is created (and used) in a file and then deleted from the application library, that item is still not removed from the file. Only when the item is removed from the application library, and the item is not in use in the file it was created in, that the item can be deleted from the file. This deletion is permanent and cannot be undone.
If you do not want to keep a custom library item any longer, you can delete it from the Library Browser.
Notes:
Note: This option is disabled if the item is currently inserted in your drawing. You must delete the item from your drawing, and then save and close the file. When you reopen the file you can delete the item from the Library Browser.
Result: A message box appears telling you the action is irreversible.
You can use the Replace Library Item command to quickly and easily replace one or more library items with another.
Result: All the library items that you selected in step 1 are replaced with the item chosen in step 3.
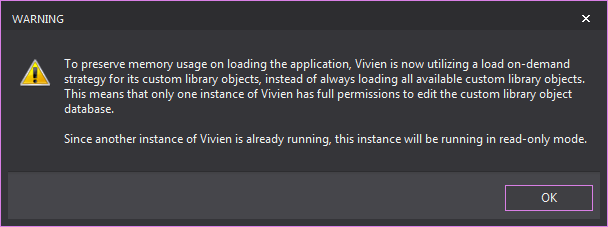
The custom library objects will be loaded on-demand when a second instance of Vivien is launched. Only one instance of Vivien has full permissions to edit the custom library object database, to preserve memory usage on loading of the application.
When the second instance of Vivien is launched, a warning dialog appears to inform that the second instance will be running in read-only mode.
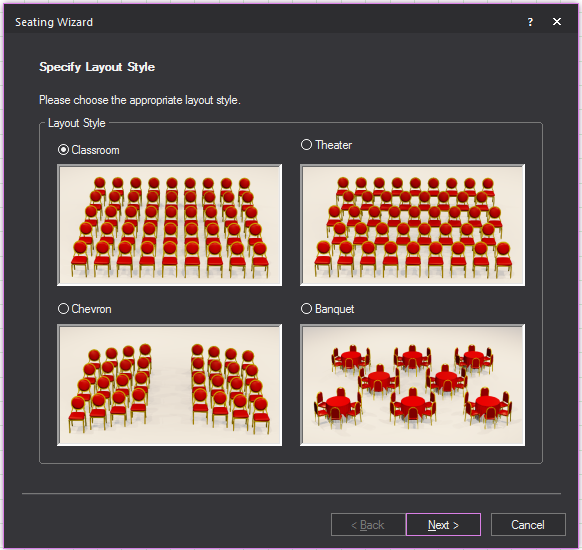
To add multiple chairs to your venue, you could add a single chair and then duplicate it using the Clone command (see “Copying objects”). A more efficient approach is to use the Seating Wizard.
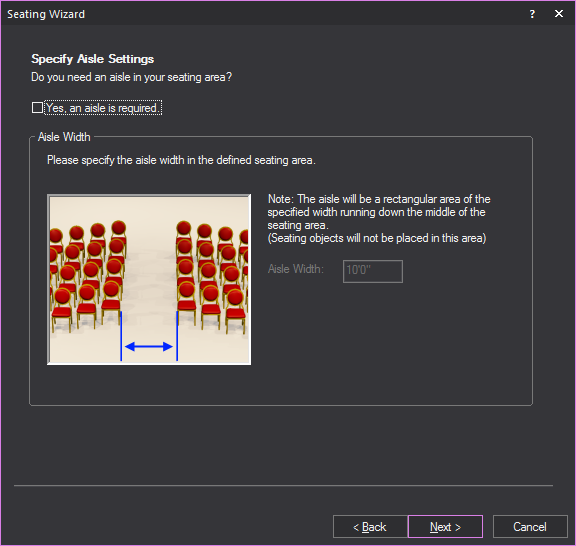
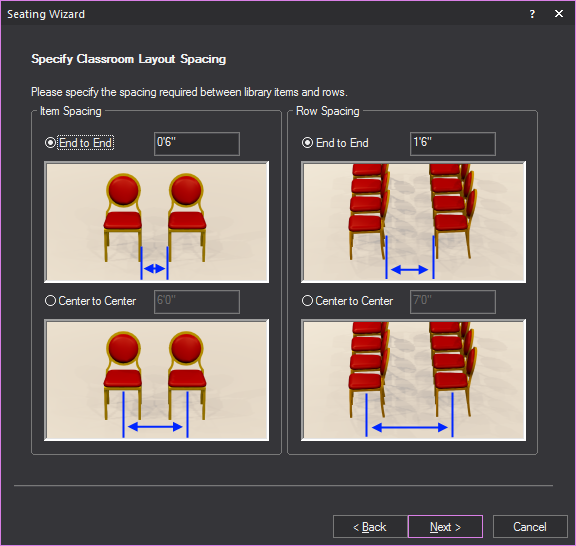
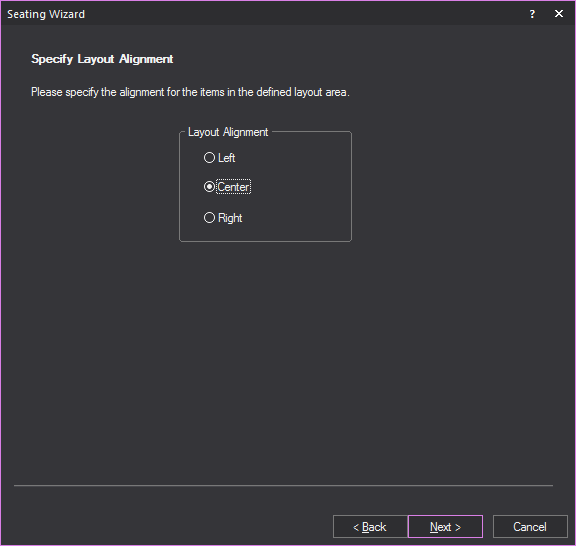
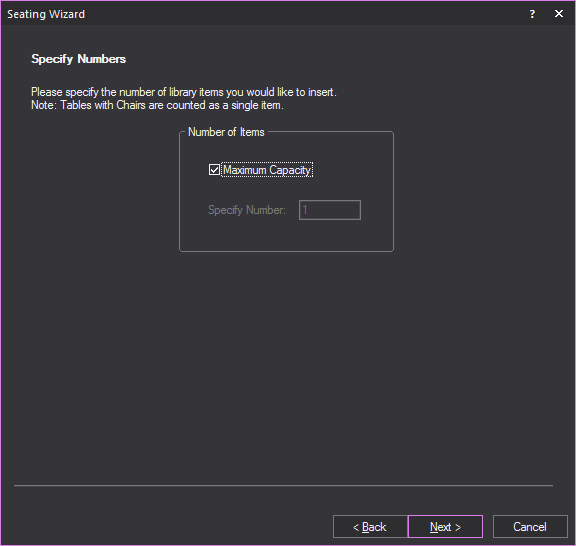
The Seating Wizard walks you through the following steps:
The Seating Wizard helps you maximize your layout area by doing all the calculations for you.
or
Click the Seating Wizard tool on the Draw Toolbar.
 The Seating Wizard button.
Result: The Seating Wizard window opens.
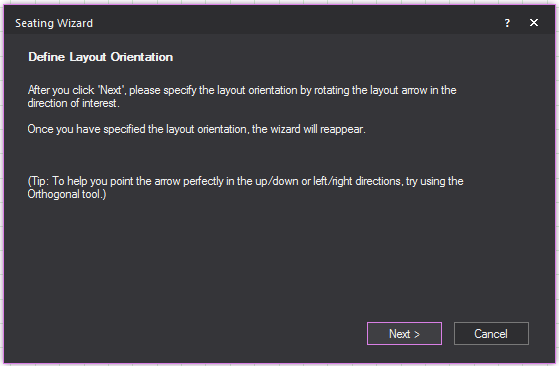
Result: The Seating Wizard window will minimize to display the Drawing Wireframe tab.
Result: An arrow will appear in the seating area attached to the cursor.
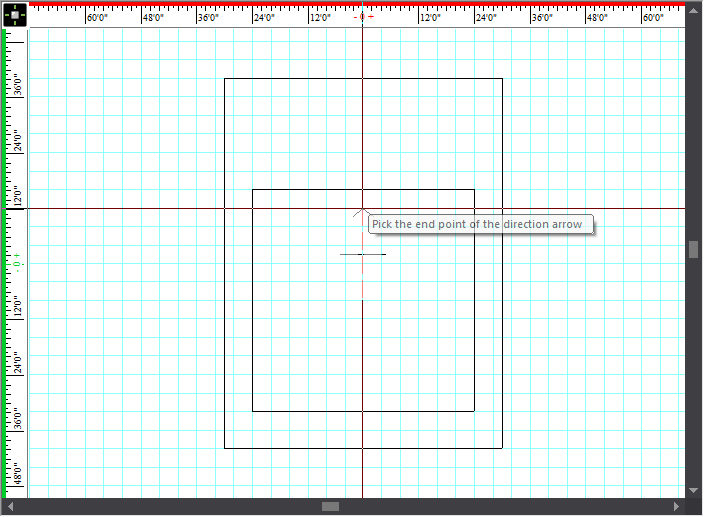
Result: The orientation of library items in the seating area will be set. The Seating Wizard window reopens.

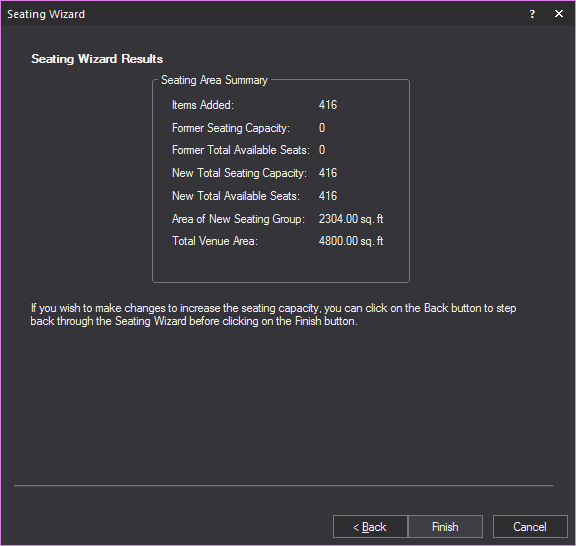
Result: A summary of the seating area will be displayed. Information such as the number of seating items you added, the seating capacity and the venue area is available for viewing. If changed to the seating area need to be made, click Back and correct as needed.
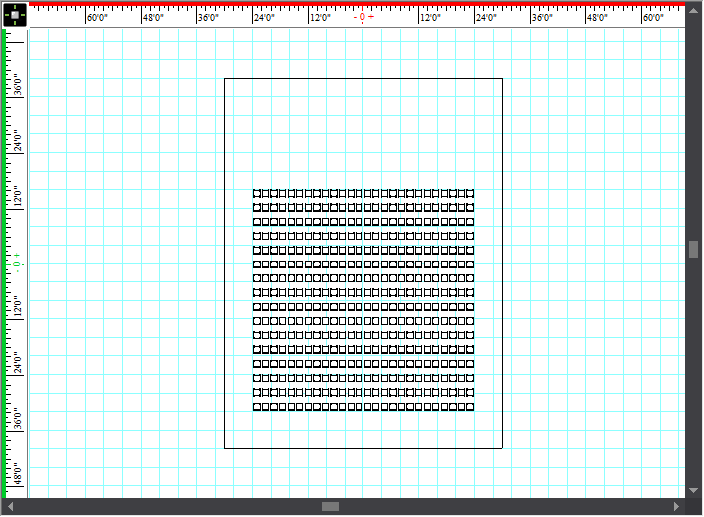
Result: The library item will be arranged in the seating area as specified in the Seating Wizard.
After you have drawn the layout area and add the chairs or tables to it, you can change its size, if desired.
Note: Ensure that you click the layout area outline, not the venue outline.
Result:
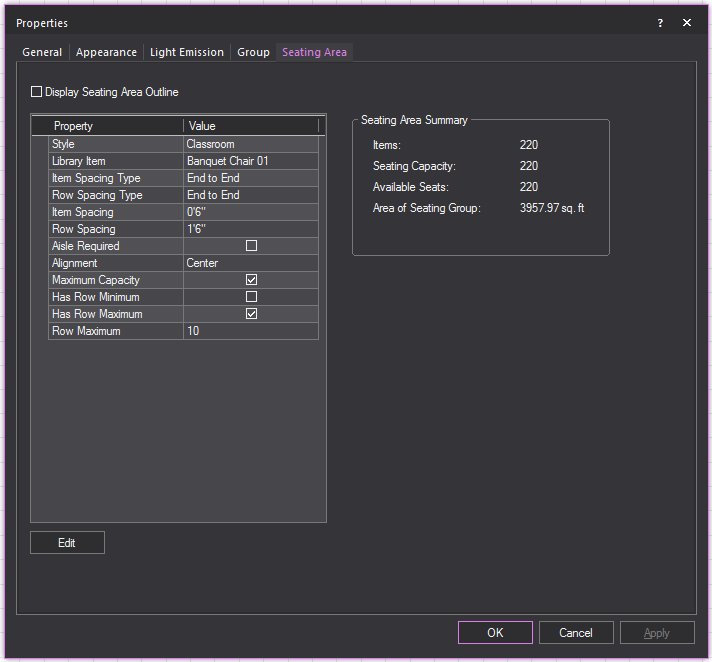
After you have drawn the layout area and add the chairs or tables to it, you can change any of its properties without going through the seating wizard.
Result: The Properties window opens with the new Seating Area tab available.
Library objects are represented as two-dimensional symbols or as three-dimensional models in your wireframe drawing.
A symbol is a two-dimensional graphic representation of an item in a wireframe view. In all wireframe views except 3D, symbols can be used to represent objects. Each object in the Library has a default symbol associated with it, and while you cannot change the symbol, you can turn it on or off. When you turn symbols off, you will see the complete wireframe drawing for the object.
For example, if you turn the symbol off for a table and chair arrangement, in a Plan view you will see the table top and legs and chair seats and legs. With the symbols turned on, you see only the table top and chair seats in Plan view.
![]() © The CAST Group of Companies
Inc., 2004-2022 All rights reserved.
© The CAST Group of Companies
Inc., 2004-2022 All rights reserved.


