
Creating
layouts for printing
The Layouts tab opens the layout design and
storage area. You create Layouts by arranging various drawing, image,
and other items on a defined paper size.
Two default layouts are included in the
layouts shortcuts: Small Layout, which is
designed to print on an 8.5” x 11” piece of paper, and Large
Layout, which is designed to be plotted on a 36” x 48” sheet of
paper. You can use these as is, modify them to suit your needs, or create
new layouts from scratch.
Creating
new layouts
You create different layouts by creating
a shortcut for each one. Any changes you make to a layout while its shortcut
is selected are saved automatically and associated with that shortcut.
Before making changes, always check that the currently selected layout
is the one that you want to modify. You can quickly switch between layouts
by clicking their shortcut icons.
To create a new layout
- Click the Layouts
tab.
- Right-click in the Layouts shortcut
area and choose .
- Type the name of the new layout, and then click
OK.
Result: An empty layout is created. A shortcut to
your new layout is added to the Layouts shortcut
bar and the title for the work area changes to correspond with the layout
name.
Note: By default, empty layouts are set up to use
8.5” x 11” sheets of paper.
Modifying
layout settings
The properties of a layout view affect
how the layout is printed. These settings are modified in the View
Options dialog box.
To modify layout settings
- Select the layout for which you want to modify
the settings.
- From the menu,
choose.
or
Click the View Options tool
on the Standard toolbar.
 The
View Options button.
The
View Options button.
Result: The View Options
dialog box appears.
For details about the View
Options dialog box, see "Layouts
view options".
Adding
items to layouts
You can add different types of items to
your layouts, as indicated below:
- basic shapes, such as lines, rectangles, ellipses,
polygons, and text
- images in any of a number of graphic formats,
such as bitmap and jpeg
- drawing items, such as wireframe views of your
floorplan
- spreadsheet items
To insert a line onto the layout
- From the menu,
choose .
or
Click the Line tool
on the Layouts Insert toolbar.
 The
Line button.
The
Line button.
- Click and drag the line on the page where you
want it to appear.
Result: The line displays on the layout.
To insert a rectangle onto the layout
- From the menu,
choose .
or
Click the Rectangle tool
on the Layouts Insert toolbar.
 The
Rectangle button.
The
Rectangle button.
- Click and drag the rectangle on the page where
you want it to appear.
Result: The rectangle displays on the layout.
To insert a round rectangle
onto the layout
- From the menu,
choose .
or
Click the Round Rectangle tool on the Layouts
Insert toolbar.
 The Round Rectangle button.
- Click and drag the round rectangle on the page
where you want it to appear.
Result: The round rectangle displays on the layout.
To insert an ellipse onto the layout
- From the menu,
choose .
or
Click the Ellipse tool
on the Layouts Insert toolbar.
 The Ellipse button.
- Click and drag the ellipse on the page where you
want it to appear.
Result: The ellipse displays on the layout.
To insert text onto the layout
- From the menu,
choose .
or
Click the Text tool on the Layouts
Insert toolbar.
 The
Text button.
The
Text button.
- Click and drag the text box.
Result: The text box displays on the layout.
- Double-click inside the box.
- Select “Your text”, and type to replace it with
the text you want to appear on the layout.
- To format the text, click on the text box and
choose from the menu. For information on formatting
text, see "Text
item properties".
Tip: You can replace your layout text with variables
by typing them directly. Use the percent symbols (%) before and after
the variable text replacement. For example, to add the Chief Lighting
Designer variable, you would type “%Chief
Lighting Designer%”. For information on smart variables and using
Scene variables, see "Text
item properties".
To insert drawings onto the
layout
- From the menu,
choose .
or
Click the Drawing tool on the Layouts
Insert toolbar.
 The
Layouts Insert button.
The
Layouts Insert button.
- Click and drag a window (placeholder) on the page
where you want the drawing to appear.
Result: The drawing, which is referenced from the
Drawing Wireframe tab, appears within the placeholder as drawn. By default,
drawings appear in Plan view and at a scale of 1/16”=1’.
To insert images onto the layout
Note: The images you insert must available on the
Images tab. For information on the Images tab, see "Storing
event images".
- From the menu,
choose .
or
Click the Image tool
on the Layouts Insert toolbar.
 The Image button.
- Click and drag a window (placeholder) on the page
where you want the image to appear.
Result: The Select Image View
to be referenced dialog box opens.
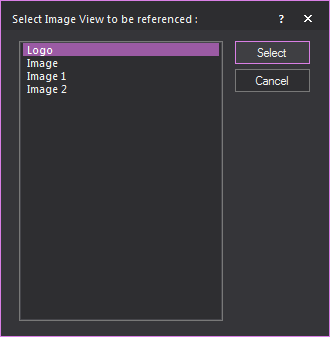
- Select the image that you want to add to the layout,
and then click Select.
Result: The image (referenced from the Images tab)
appears within the placeholder as drawn.
To insert spreadsheets onto the
layout
Note: The spreadsheets that you insert must available
on the Spreadsheets tab. For information
on the Spreadsheets tab, see "Creating
spreadsheets".
- From the menu,
choose
or
Click the Spreadsheet tool
on the Layouts Insert toolbar.
 The
Spreadsheet button.
The
Spreadsheet button.
- Click and drag a window (placeholder) on the page
where you want the item to appear.
Result: The Select Spreadsheet
to be referenced dialog box appears.
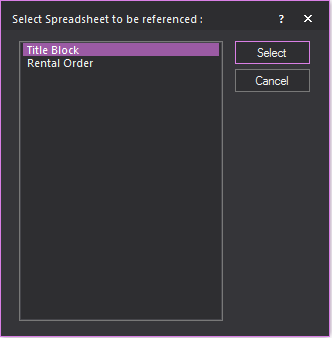
- Select the spreadsheet you want to add to the
layout, and then click Select.
Result: The selected worksheet (referenced from the
Spreadsheet tab) appears within the placeholder
as drawn.
To insert report
items onto the layout
- From the menu,
choose .
Tip: You can also use the Report tool
from the Layouts Insert toolbar.
 The
Report button.
The
Report button.
- Click and drag a window (placeholder) on the “page”
where you want the item to appear.
Result: The Select Report to
be referenced dialog box appears.
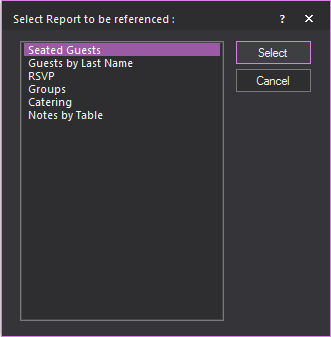
- Select the report item that you want to add to
the layout, and then click OK.
Result: The selected report (referenced from the Reports tab) appears within the placeholder
as drawn.
Notes:
- If the Group By option
has been set for a report, the report cannot be added to a layout.
Setting the Group By option creates
page breaks within the report and layouts do not support reports with
page breaks.
- Vivien will not display the Report on a Layout
if the number of rows in the Report is greater than 200.
To lock an object in
the layout
- In the layout, select the element that you want
to lock in place.
- From the menu,
select .
Result: The object cannot be moved on the layout.
When selected, the object’s corners turn red, indicating that the object
is locked.
Formatting text
You can change the color, font, and style
of text within a text box.
To format text
- Select the Text item.
- From the menu,
choose .
Result: The Item Properties
dialog box appears.
- Click the Text tab
and modify options as desired. For details, see "Text item properties"
- To change text properties such as the font style
and size, click Set Font, and then make
your changes.
Layout Template
To save time, you can use the Layout Template
feature to select multiple objects in your layouts and group them for
insertion into other drawings.
Layout Template icons
The Layouts Insert
toolbar includes the three icons for creating, inserting and deleting
Layout Templates. You can also use the menu commands, as detailed in the
procedures below.
To create a new
layout template
- In your Layout, select the items that you want
to include in the Layout Template. For example, you can select Title
Blocks, Plot Notes, Custom Legends and Keys, Disclaimers, and so on.
- Right-click and select .
- Type a name for your new Layout Template.
- Click OK.
To insert a layout
template in your layouts
Once you have created a Layout Template,
you can insert it into other drawings as follows:
- In your Layout, right-click and select .
- In the window that appears, select the name of
the Layout Template that you want to insert, and then click OK.
- Navigate to the location where you want to insert
the Layout Template and click to place it.
Tip: If you do not select any items in the Layout,
saving a Layout Template will prompt you to save the entire Layout as
a Layout Template. This includes Layout view options, such as Paper Size
and Tile Printing. To insert the entire Layout, right-click in the Shortcut
Bar (Layouts page), and select New Layout Using Layout
Template.
To delete a layout
template from the database
Once you have created a Layout Template,
you can delete it from the database, which means it will no longer be
saved with your Vivien file and you will no longer be able to insert it
in subsequent drawings.
- On the Layouts tab,
on the Layouts Insert toolbar, click the
Delete Layout Template icon .
 The
Delete Layout Template
button.
The
Delete Layout Template
button.
- In the window that appears, select the name of
the Layout Template that you want to delete, and then click the Delete checkbox.
- Click OK to delete
the Layout Template.
Content properties
Content properties affect the content of
Drawing, Image, and Spreadsheet item placeholders in the layout.
To modify content properties
- Select the item you want to modify (Drawing, Image,
or Spreadsheet).
- From the menu,
choose .
or
Click the Content
Properties tool on the Layouts Edit toolbar.
 The
Content Properties
button.
The
Content Properties
button.
Result: The Content Properties
dialog box appears.
Note: Content properties for Images and Spreadsheets
display the name of the inserted item. Content properties for Drawings
are discussed on "Drawing
item properties".
Item
properties
As with all objects in Vivien, the objects
you place on your page have unique properties.
Properties affect the content of the item
and they affect the placeholders and the scaling of the contents. Options
here include the outline’s weight and color, and various printing options
for the contents such as scale.
You can also rotate text, drawing components,
images and other items in the Layouts tab.
This feature is very handy if, for example, you like drafting in Landscape
but printing in Portrait. Simply rotate your Layout items the way you
want.
To modify item properties
- Select the item you want to modify.
- From the menu,
choose .
or
Click the Item Properties tool
on the Layouts Edit toolbar.
 The
Item Properties button.
The
Item Properties button.
Result: The Item Properties
dialog box appears.
Note: The first page of the properties dialog is
identical regardless of the type of item selected.
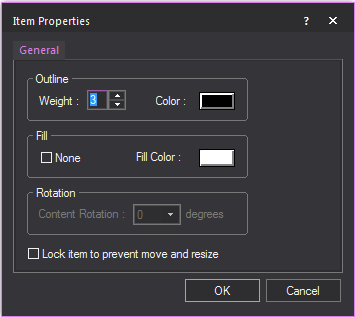
General tab
Options on the General tab affect the outline, fill color and rotation
of the placeholder.
- Weight: Select the
weight of the placeholder outline, in points.
- Color: Click the Color button to display the color chooser
and select a color for the placeholder outline.
- None: Uncheck this
option to fill the placeholder box with the color specified by Fill Color.
- Fill Color: Click
the Fill Color button to display
the color chooser and select fill color for the placeholder.
- Content Rotation:
Select the degree to which you want to rotate the placeholder.
- Lock item to prevent move
and resize: Select this checkbox to prevent the layout item
from moving or being resized.
Text item properties
Properties on the Text tab
affect the text color, font, and style of text within a text box.
To modify text item properties
- Select the spreadsheet item.
- From the menu,
choose .
or
Click the Object Properties tool
on the Layouts Edit toolbar.
 The
Item Properties button.
The
Item Properties button.
Result: The Item Properties
dialog box opens.
- Click the Text tab.

- Modify options, and then click OK.
Text tab
- Text: Type the text
you want displayed in the text box.
- Insert Smart Variable:
Click this button to open the Smart Variables window
and select a smart variable text from the list that was set in the
Event Info tab in Document
Options.
Scene
variables in layouts:
The following rules apply when you use
the “%Scene%” variable with the Text
item you are inserting in Layouts.
- When ALL Scene-dependent items on the Layout
are set to the same Scene, Text items on that Layout which contain
the “%Scene%”
variable will display the name of the Scene.
- When Scene-dependent items on the Layout are
set to different Scenes, or when some items are set to one or more
specific Scenes, and some items are set to Follow
Current Scene, Text items on that Layout which contains the
“%Scene%”
variable will display the word “Multiple”.
- When ALL Scene-dependent items on the Layout
are set to Follow Current Scene, Text
items on that Layout which contains the “%Scene%”
variable will display the name of the current scene.
- Wrap Text: Select
this checkbox to wrap words that exceed the column width.
- Truncate with Ellipses:
Select this checkbox to abbreviate the text that exceed the column
width with the Ellipses symbol.
- Text Color: Click
this button to display the color chooser and select a color for the
text.
- Set Font: Click this
button to display the Font dialog
box, where you can modify the font, font style, size, effects and
color of the text.
- Text Alignment: Click
on the Horizontal and Vertical drop-down
menus to set how text aligns in the text box.
Drawing item properties
Drawing items can be modified or edited
to meet printing requirements. Their content properties are detailed below.
To modify drawing item properties
- Select the Drawing item.
- From the menu,
choose .
or
Click the Content
Properties tool on the Layouts Edit toolbar.
 The
Content Properties
button.
The
Content Properties
button.
Result: The Content Properties
dialog box appears.
- Modify options, and then click OK.
Notes:
- Options which do not appear in the Drawing item’s
Content Properties follow the settings
defined in Document Options.
- To modify the outline and fill of the Drawing
item placeholder, choose Object Properties from
the menu in step 2.
General tab
Options on the General tab
affect the scene that displays in the Drawing item. Only objects on the
active layers display in the layout.
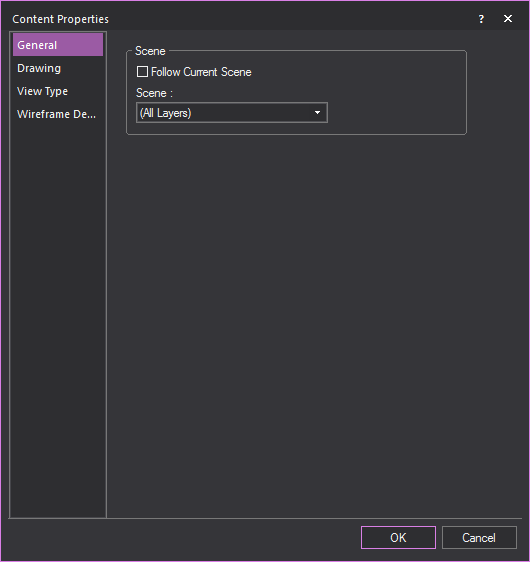
- Follow Current Scene:
Check this option to use the scene that is displayed in the drop-down
list on the Scene toolbar. Uncheck
this option and select the desired scene from the Scene drop-down
list. For more information on scenes, "Scenes".
Drawing tab
Options on the Drawing tab affect the angle at which the Drawing
item prints and the scale.
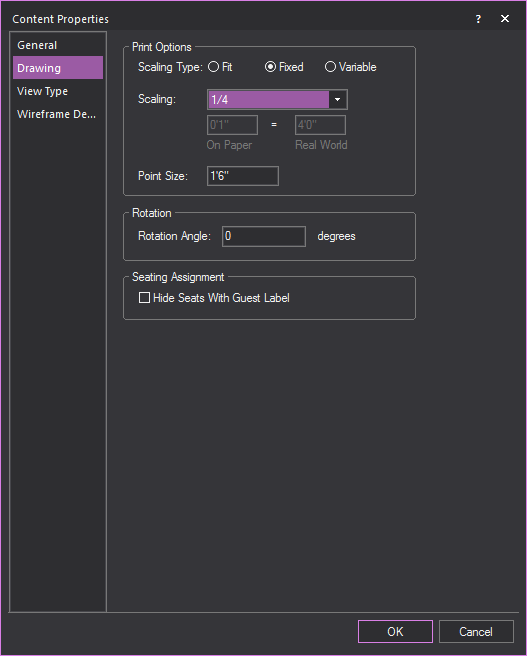
Print Options
- Fit: The entire drawing
scales to fit inside the placeholder.
- Fixed: The
Drawing item prints at the specified scale. To determine which portion
of the Drawing item displays inside the placeholder, choose from the menu. Inside that view, you can move
around a white rectangle that represents the placeholder. For more
information on the command,
"Adjusting
the contents of a drawing item".
- Variable: In
this case, when you use the command
you can change the size of the white rectangle without affecting the
original placeholder. The portion of the drawing contained within
the white rectangle is scaled to fit in the placeholder. For more
information on command, "Adjusting
the contents of a drawing item".
- Scaling: Scale ratio
drop-down list.
- On paper: The scale
ratio that you want to use on a paper copy of the layout.
- Real World: The “real”
measurement for the scale ratio that you specify in the On
paper box. For example, you may want to use a scaling
of one inch in a paper copy of your layout. This one inch measurement
translates to a “realistic” measurement (for example, 3 feet).
- Point Size: Size
at which points are printed.
Rotation
- Rotation Angle: Type
an angle value in degrees to print the Drawing item on an angle.
Seating Assignment
- Hide Seats With Guest Label:
If you have chosen to show the guest name rather than a circular icon
on each assigned seat, select this checkbox to hide the seat outline
under each guest’s name.
View type tab
Options on the View
type tab affect the view of the drawing that displays in the
layout.
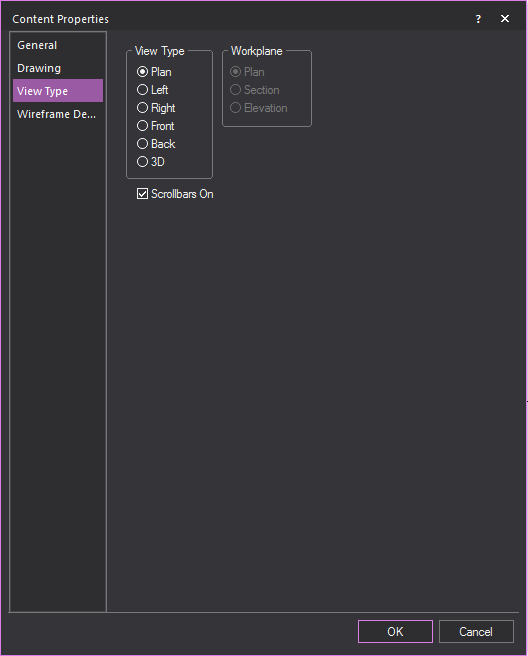
- View Type: Select
the type of view you want displayed in the layout. For details, see
"View types".
- Workplane: These options
are available when 3D is the selected
View Type. For information on workplanes,
see "View types".
- Scrollbars On: Select
this checkbox to display the scrollbars on the bottom and left side
edges of the layout. Deselect this option to turn the scrollbars off.
Wireframe Details tab
Options on the Wireframe
Details tab affect the amount of information that is shown
in the Drawing item.
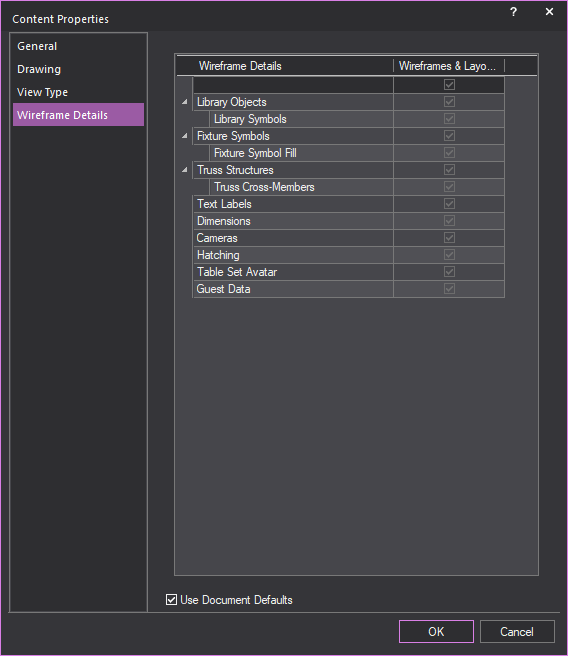
- Wireframe Details:
Information of objects in Drawing Wireframe which you can display
on the layout.
- Wireframes & Layouts:
Select the corresponding checkboxes in this column to display the
selected wireframe information on the layout.
- Select the checkbox on the top row of the column
to select all checkboxes below.
- Click on the arrows in the leftmost column to
expand and display the rows with additional options.
- Library Objects: Select
this checkbox to always show library objects in drawing wireframe
views, and then select the Library Symbols option.
- Library Symbols:
Select this checkbox to always show the library objects as 2D symbols
in 2D wireframe views. If this option is disabled, library objects
will be displayed as 3D models instead of their 2D symbols.
- Fixture Symbols: Select
this checkbox to always show fixtures as 2D symbols in 2D wireframe
views, and then select the Fixture Symbol Fill option. If Fixture
Symbols is disabled, fixtures will be displayed as 3D
models instead of their 2D symbols.
- Fixture Symbol Fill:
Select this checkbox to always display filled 2D fixture symbols in
drawing wireframe views. If this option is disabled, fixtures will
be displayed as 3D models instead of their 2D symbols.
- Truss Structures:
Select this checkbox to always show truss objects in drawing wireframe
views, and then select the Truss Cross-Member option.
- Truss Cross-Members:
Select this checkbox to always display the cross-members of truss
structures in drawing wireframe views. Clear this checkbox to hide
the truss cross-members on your drawing to reduce the clutter or to
increase the speed of the display.
- Text Labels: Select
this checkbox to always show text labels on the plot.
- Dimensions: Select
this checkbox to always show dimensions on the plot.
- Cameras: Select this
checkbox to always show cameras on the plot.
- Hatching: Select this
checkbox to always show hatching styles assigned to displayed objects.
- Table Set Avatar: Select this checkbox if you always
want to see the dotted line around a Table Set that allows you to
select every item inside of a Table Set without having to individually
click each item.
- Guest Data: Select
this checkbox to always show details about the guests assigned to
each seating item.
- Use Document Defaults:
Select this option to use the settings defined in the Document
Options dialog box.
Image
item properties
Special considerations should be given
to printing images on layouts. To maintain the integrity of the image,
Vivien can maintain the aspect ratio of the image so as not to distort
it.
To maintain aspect ratio
- Select the image item on the layout.
- From the menu,
choose.
or
Click the Item Properties tool
on the Layouts Edit toolbar.
 The Item Properties button.
- Click the Image tab.
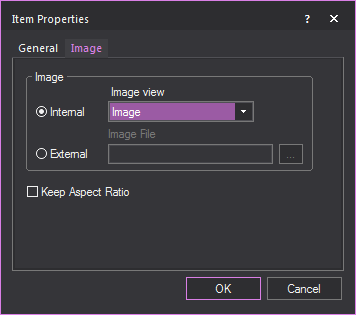
- Modify options, and then click OK.
- Internal: When this
option is selected, only the images saved in the Images
tab are available.
- External: Select
this option to select an image file from any location.
- Keep Aspect Ratio:
Select the Keep Aspect Ratio checkbox
to maintain the height versus width relationship of the original image,
regardless of how you resize the placeholder.
Spreadsheet
item properties
By default, spreadsheets display in your
layout at a scale of 100%, regardless of the paper size.
To modify spreadsheet item properties
- Select the spreadsheet item.
- From the menu,
choose .
or
Click the Item Properties tool
on the Layouts Edit toolbar.
 The
Item Properties button.
The
Item Properties button.
Result: The Item Properties
dialog box appears.
- Click the Spreadsheet
tab.
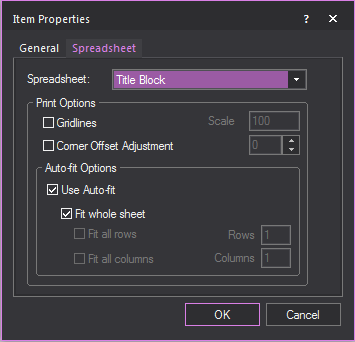
- Modify options, and then click OK.
- Spreadsheet: Select
the spreadsheet you want to display in the selected placeholder.
- Gridlines: Select
this checkbox to display the spreadsheet grid lines in the layout.
- Scale: Type a percentage
value to increase or decrease the size of the spreadsheet in the placeholder.
Adjusting
the contents of a drawing item
If you chose fixed or variable scaling
on the Printing tab, you can further
set up how the drawing appears within the placeholder.
To adjust the contents
- With the drawing item still selected, from the
menu, choose .
or
Click the Open Contents tool
on the Layouts Edit toolbar.
 The Open Contents button.
Result: A new window opens displaying your drawing
and the item placeholder.
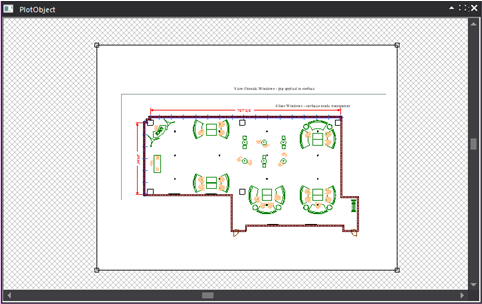
- Drag the white area to adjust the positioning
of the placeholder as desired.
- Close the window.
Working
with item placeholders
You can move and resize placeholders on
the layout page.
You can also stack them on top of each
other. Use the Bring to Front and Send to Back commands to move the selected
placeholder and its contents to the front and to the back of the stack,
respectively.
To resize a placeholder
- Click the item to select it.
- Drag the marker points of the placeholder to resize
it.
Note: Resizing a placeholder affects which portion
of the content displays. You may need to edit the scale of the contents
or adjust the contents after resizing.
To move a placeholder
- Click the item to select it.
- Drag the placeholder to the desired location.
Tip: Use the gridlines to line up placeholders.
To copy a placeholder and its contents
- Click the item to select it.
- Hold the CTRL key
and drag the copied item to the desired location.
To change the stacking order of placeholders
- Click the item to select it.
- Do one of the following:
- To bring the selected object to the front, from
the menu, choose .
or
Click the Bring to
Front tool on the Layouts Edit toolbar.
 The Bring to Front button.
- To bring the selected object to the front, from
the menu, choose .
or
Click the Send to
Back tool on the Layouts Edit toolbar.
 The Send to Back button.
To prevent movement and resizing of placeholders
From the menu, choose .
or
Click the Lock tool
on the Layouts Edit toolbar.
 The Lock button.
To only view placeholders
From the menu, choose .
or
Click the Show Place
Holders Only tool on the Layouts
Edit toolbar.
 The
Show Place Holders Only
button.
The
Show Place Holders Only
button.
To rotate objects
- Select an object to rotate.
- From the menu, choose then0°90°180°or270°.
or
Click the appropriate Rotate
object tool on the Layouts
Edit toolbar.
Exporting layouts
While working with your layout, you can
export it at any time to a bitmap (.bmp) or JPEG (.jpg) graphic in the
location of your choice. This feature enables you to share the layout
more easily with your coworkers.
To export layouts
- While in the Layouts tab, click >
.
Result: The Save As window
appears.
- Navigate to the location where you want to save
the image.
- In the File name box,
type the name of the exported layout, or accept the default name provided.
- From the Save as type drop-down list, choose the graphic
format for the exported layout.
- Click Save.
Result: Vivien saves the image in the location you
specified.